FRAME
·
STEP D1 · 01 OF 10
01
Anchor the four foot plates to the slab
First action on the slab — sets the entire system geometry.
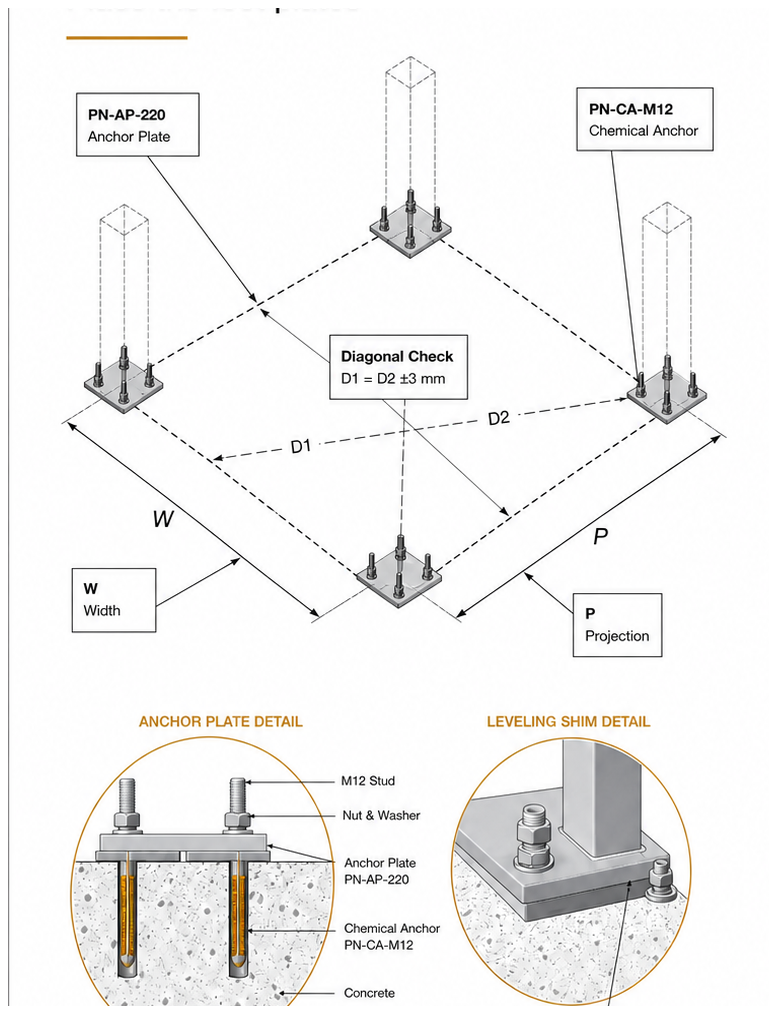 Fig. 01 — Anchor the four foot plates to the slab
- 1Mark the four corner positions according to the site survey.
- 2Verify W x P footprint and check both diagonals.
- 3Place the ground connections with feeds facing inside.
- 4Drill and fix the plates to the floor.
- 5Check that all plates are level.
- 6Confirm the layout before column assembly.
- Foot plate: PN-AP-220
- Anchor fastener: PN-FX-M6
- Layout: W x P rectangle
- Diagonal tolerance: ±3 mm
- Feed orientation: inside
Keep the feed/open side facing the system interior.
Wrong orientation will affect water outlet alignment.
Tape measure, water level, drill, hammer
37 min
About step 1 of the Luxa Riparo Pura Carport installation
Anchor the four foot plates to the slab · FRAME · 10 step · Luxa Riparo Pura Carport (free-standing aluminium carport)
First action on the slab — sets the entire system geometry.
Nearby steps in this installation
← Back to the full Luxa Riparo Pura Carport installation guide

